huh..hav been thru alot of r&d lately. i'm realy didn't get what r&d actually stand in malaysia.it's relex&delay?:D.heh. being someone who spent almost 2 years on r&d, i felt that ways.heh.at least for me.but thanx god, i made my r&d done.huhh.ohh back to the topic. actually, lately i stumbled accross a few things/domain. it;s started with embedded system, security competation,,,bla..bla..bla. for embedded system, i'll leave it for next post.yeahh, hopefully.:D.so, now, back to the topic. by passing blocked ssh port.hehe. some sort of ppls tend to change the default ssh's port from 22 to unblocked port(80,443). it's relatively rare to find admin (if, he does, woww-i'm amazed.:p) to closed port 80 and 443 since these two ports hold responsiblelity to handle http and https traffics. but do you really think, people who provide free ssh services will change the default for our own gud. i dont think so man.so, here is how u can actully by pass the blocked ssh port. what u really need are tor (the onion routing) and privoxy. first things first.
-------------------------------howto begin----------------------------------------------------
1.install tor. (im using gentoo,arrgg, installation is just demm plain straight forward.go figure for ur distro)
shell>emerge -av tor
2.install privoxy
shell>emerge -av privoxy
3.configure privoxy's config file.
shell>vi /etc/privoxy/config
#things that you should change.
#-----------------------------
#on line 661
listen-address 127.0.0.1:8118
#on line 1009
forward-socks4a / localhost:9050 .
#hehh,watch out the "." at the end of localhost:blalal .
#u really need to put that magic "."
4.configure tor's config file
shell>vi /etc/tor/torrc
#things that you should change.
#-----------------------------
#on line 30
SocksPort 9050
#online 31
SocksListenAddress 127.0.0.1
#online 34
ReachableDirAddresses *:80
#online 34
ReachableORAddresses *:443
5.config ur(ssh luser) ssh's config file
shell>vi /home/yomuds/.ssh/config
#add these line to ur config file
Host myillegalssh.org
#whatever host u can put here.
ProxyCommand socat - SOCKS4A:localhost:chi.spunge.org:22,socksport=9050
#chi.spunge.org just an example. put your real ssh server here
#e.g=ProxyCommand socat - SOCKS4A:localhost:myhomessh.no-ip.org,socksport=9050
6. run our tor and privoxy services.
shell>/etc/init.d/tor start
shell>/etc/init.d/privoxy start
7.test our configuration.yey..\0/
before
yomuds@gentoob0x ~ $ ssh yomuds@chi.spunge.org
ssh_exchange_identification: Connection closed by remote host
demm!!
after
shell>ssh yomuds@myillegalssh.org
Welcome to Spunge.org. Please log in....
yomuds@chi.spunge.org's password:
Last login: Mon Sep 4 14:42:52 2006 from static-68-179-33-129.ptr.terago.ca
System News -
Tadaaa!!!!
--------------------------------end howto---------------------------------------
this howto should worked if ur admin didn't block tor network.if he did, then we're out of luck.it's happen to me.:(.demm..*update*-i was wrong,our admin didn't block the tor network yet.huhh..legaa!!.:D..\o/
Sunday, September 10, 2006
Sunday, August 20, 2006
gentoo + arch not set..mor0n...
--------------------------error start-----------------------------------
gentoob0x yomuds # emerge -av dsniff
These are the packages that I would merge, in order:
!!! ARCH is not set... Are you missing the /etc/make.profile symlink?
!!! Is the symlink correct? Is your portage tree complete?
-------------------------error end-------------------------------------
have you guys having this problem after emerging with --sync option. if you had, here is a solution to overcome this problem.
shell> ls -al /etc/make.profile.
check where is the softlink of /etc/make.profile. if it's pointing to the correct file (/usr/portage/profiles/default-linux/x86/2006.0), then it is shoudn't be the problem. but if it not, you need to re-create the softlink file. remove the current /etc/make.profile first.
shell>rm /etc/make.profile
shell>ln -s /usr/portage/profiles/default-linux/x86/2006.0 /etc/make.profile
hope this help.:D.gentoo always had bad surprises for you guys.btw, gentoo roxx!!.:D
Friday, August 18, 2006
vmware player & qemu : not a perfect match..:P
aha, i;m glad for using qemu instead of vmware workstations. anyways, all sort of this is just a metter of personal taste. working in linux env, certain things can be done easily with CLI tools.:D. a few ppls said that to change setting on qemu is quite difficult like to change size of rams, cdrom file, network setting and bla bla bla. if you're using qemu frequently, don't forget the combination keys of "ctrl+alt+2". this combination will help and allow you to manipulate qemu behaviour.:D.trust me, it's so easy to run qemu than vmware player. at least on qemu i didn't need to recompile my new kernel modules.hahaha. just another execuse. anyways, i just done configured and installed a freebsd image using qemu. but, since my fren need to run this image for vmware player, i reformated the image format to vmdk. example on qemu to create vmdk image format:
shell> qemu-img create -f vmdk Freebsd.iso 10G
i was thinking at that memont that there are couldn't be any problems when i boot the image using vmware player. i was wrong, dudes. vmware player only recognized a configuration file with extenstion *.vmx. what?. then, i'm clueless. how could i create that *.vmx file when i didn't even have vmware workstations(no pirated software please). lucky me to know that file *.vmx is only text base file.:D.kewl. then the next thing is to googling around about vmware player config file. i was stumbled to this site. woww, greate efforts man. thanx noobacide.:D. noobacide's tool is a tool to allow you to manually configure *.vmx file to fit your need.:D. here is my *.vmx config file:
----------------begin-------------------------
config.version = "8"
virtualHW.version = "3"
MemAllowAutoScaleDown = "FALSE"
MemTrimRate = "-1"
uuid.location = "56 4d 5c cc 3d 4a 43 29-55 89 5c 28 1e 7e 06 58"
uuid.bios = "56 4d 5c cc 3d 4a 43 29-55 89 5c 28 1e 7e 06 58"
uuid.action = "create"
checkpoint.vmState = ""
displayName = "FreeBSD 6.0"
guestOS = "freeBSD"
memsize = "256"
ethernet0.present = "TRUE"
ethernet0.connectionType = "bridged"
ethernet0.addressType = "generated"
ethernet0.generatedAddress = "00:0c:29:7e:06:58"
ethernet0.generatedAddressOffset = "0"
usb.present = "TRUE"
usb.generic.autoconnect = "TRUE"
sound.present = "TRUE"
sound.virtualdev = "es1371"
scsi0.present = "TRUE"
scsi0.virtualdev = "buslogic"
scsi0:0.present = "FALSE"
scsi0:1.present = "FALSE"
floppy0.present = "TRUE"
floppy0.fileName = "A"
floppy0.startConnected = "FALSE"
ide0:0.present = "TRUE"
ide0:0.fileName = "FreeBSD-6.0.iso"
ide0:0.deviceType = "disk"
ide0:0.mode = ""
ide0:0.redo = ""
ide0:0.writeThrough = "TRUE"
ide0:0.startConnected = "TRUE"
ide0:1.present = "TRUE"
ide0:1.fileName = "cdrom"
ide0:1.deviceType = "cdrom-raw"
ide0:1.autodetect = "FALSE"
ide0:1.startConnected = "FALSE"
ide1:0.present = "FALSE"
ide1:1.present = "FALSE"
----------------end----------------------------------
aha, it's quite a lot of works need to done before you can 'freely' using your new image.:D.so, im not gonna use vmware player as long as qemu is still in my hand.:P..nuff said.
p/s: why i;m always got problems when compiling a brand new kernel?.even with 'make oldconfig' from working kernel.:(.my bads.
Monday, July 24, 2006
Open Source CLI downloader -wget - aget roxx
it's kinds of uncomfortable for me if i can't download all contents for article im reading because they're chapter-base or section-based. by doing that, the authors tend to forget to create one single html/pdf/or_whatever file. *sigh.don't get me wrong, i'm here wasn't to complain about the authors nor the articles. It's really nice if we only need to save/download a single file rather then a bounch of files with a weird name like "chap01_sec1_titleX_beginner.html".huhh.:D. anyways, back to the post title,yeahh downloader. lucky for us to had downloaders which are can download a whole directory to us. speaking of which CLI downloaders are fit for me, i picked wget and aget. why aget?, simply because wget didn't support simultaneous downloading. here is wget command to download all files inside a directory. We can control to lets wget recursively crawling to only a directory. when you're enable wget to recursively downloading files without controling how far it can crawl, your're in big trouble because wget will get all files inside the website which is we didn't want todo that.
shell>wget -r -k -l 1 http://www.example.com/articles/
-r for recursive
-k convert all links to local files
-l level of depth wget can crawl.
shell >wget -r -k -l 1 http://www.freeos.com/guides/lsst/
---------------------------output------------------------------------
00:37:59 (1.23 KB/s) - `www.freeos.com/guides/lsst/aboutauth.html' saved [3267/3267]
--00:37:59-- http://www.freeos.com/guides/lsst/index.html
=> `www.freeos.com/guides/lsst/index.html'
Connecting to www.freeos.com|66.98.242.53|:80... connected.
HTTP request sent, awaiting response... 200 OK
Length: 12,438 (12K) [text/html]
--------------------------end-----------------------------------------
btw, if you want to download bash-scripting tutorial, link i provided is good resource for that. have a nice reading days ahead.
opps. im using aget when i want a simultaneous download. you can use aget with this example
shell> aget -n 10 http://mirror.oscc.org.my/fedora/core/4/i386/iso/FC4-i386-disc1.iso
-n how many thread you want to open
-happy downloading with open source tools.:p
Friday, July 14, 2006
qemu:another problems faded away
today, i played with fedora core at home which i installed 5-6 months back. the motivations behind this issue becouse i got 192MB sdram from a friend,hafiz.thanx, dude.:D.so, i start to reinstall the ram and test it with my old/ancient pc running fedora core 4.hahh,my bios showed that i just had extra 192MB of ram.hahaha.gud.:D.when my fedora was booting smoothly, i figured out for how long this machine didn't do any sort of update.:D.hehh.kernel is still running on default installation which is 2.6.11.x.unstable, current kernel is 2.6.17.4.hahaa.so, i was thinking to update this system.being a streamixless home, i decided to bring this machine to my workplace for upgrading the system.ohh, wait, why not just unplug the hdisk and runing it thru qemu.woow, nice idea. beside that, i bought a new tool called "usb 2.0 to ide cable".nifty tools i told u.i recommand u to have one(u can find it at lowyat).so i can plug my fedora hdisk to the usb cable and i ready to go.:D.qemu even asked me which kernel do i need to pick up upon booting.:D.seem like i gonna use this way to upgrade my two others machines running openBSD 3.8 and freebsd 6.0
shell>qemu -hda /dev/sda -m 128 -user-net
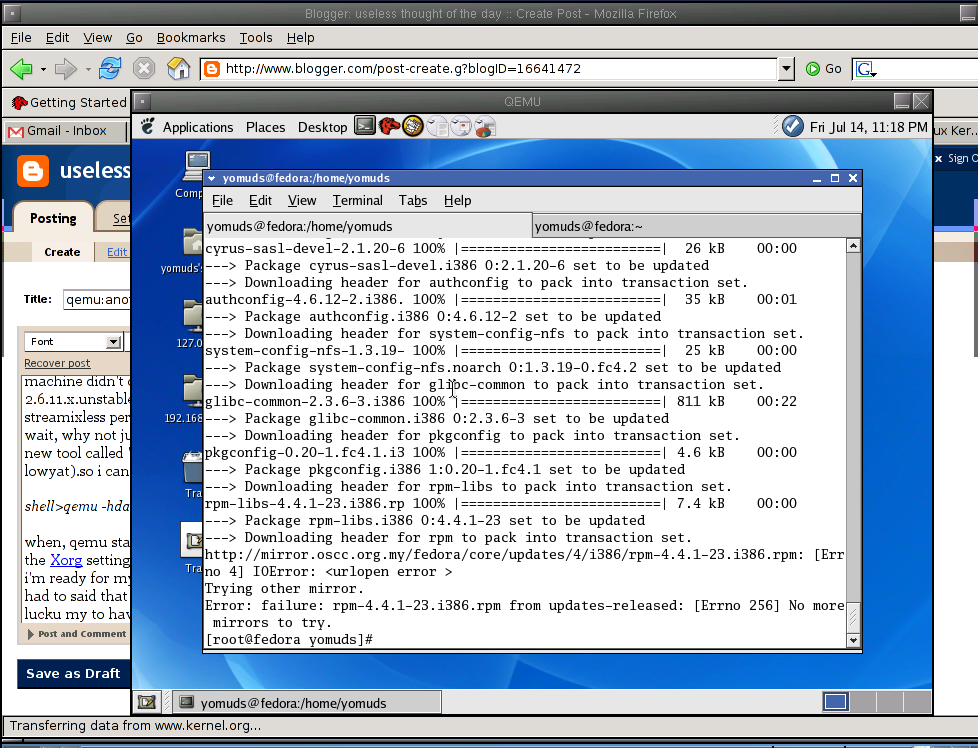
when, qemu start to booting my fedora core hdisk, i've had countered with simple problem regarding the Xorg setting.i fixed up this problem with a new setting for display screen set to 800x600.so, now i'm ready for my upgrading process.here is screenshot for my fedora core updating itself with yum.:D.
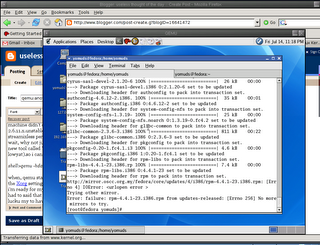
i had to said that i hate yum so much.:D.hehhe.its freaking slow compare to port/portage system. btw,lucky me to had our malaysian base fedora mirror provided by oscc. you can check the mirror here. i also had centos4.2 on qemu img to be update, but dont worry, let finish this update first.:D.thanx to brilliant qemu features.
shell>qemu -hda /dev/sda -m 128 -user-net
when, qemu start to booting my fedora core hdisk, i've had countered with simple problem regarding the Xorg setting.i fixed up this problem with a new setting for display screen set to 800x600.so, now i'm ready for my upgrading process.here is screenshot for my fedora core updating itself with yum.:D.
i had to said that i hate yum so much.:D.hehhe.its freaking slow compare to port/portage system. btw,lucky me to had our malaysian base fedora mirror provided by oscc. you can check the mirror here. i also had centos4.2 on qemu img to be update, but dont worry, let finish this update first.:D.thanx to brilliant qemu features.
Friday, July 07, 2006
OpenBSD: network installation thru qemu
yesterday i tried to upgrade my openbsd 3.8 virtual machine running on qemu inside gentoo box. after reading a couples of docs/howto, i'm ready to give my openbsd3.8 an upgrade.goshh!!, cvs port is closed.demm.i had no choice now.since on official openbsd faq/doc recommanded to always install a brand new release with fresh install,i go for it.aha, now, waiting to my notebook done downloading all openbsd files to make iso cd,i getting tired. my stomach cry asking to be feed.:(.so, i decided to just install thru network.so, i just download a file called floopy39.fs. then i create an image file for new openbsd installation.ohh,wait! i need to create a bootable floopy disk first.but i didn't have a floopy drive. thanx to qemu for allowing us to pass any bootable files to be boot. i create an image file for bootable floopy and copy all contents from floopy39.fs into it.
root@vm>qemu-img create openbsdfloopy.iso 2M
root@vm>dd if=floopy39.fs of=openbsdfloopy.iso
next is to create my installation file for openbsd3.9
root@vm>qemu-img create -f qcow openbsd3-9.iso 6G
then, i fired my qemu up to boot from openbsdfloopy.iso to install openbsd thru network.
root@vm>qemu -fda openbsdfloopy.iso -hda openbsd3-9.iso -m 64 -user-net -boot a
aha, more quicker actually compare with downloading openbsd files to convert them to iso. when installing openbsd, i picked network installation thru http by using mirror from japan{http://ftp.jp.openbsd.org}.you can read more details on installation openbsd thru openbsd official docs page.:D.nah, i can go for dinner now and just let openbsd finish up for the rest.:D.
today, i issued command 'uname -a' on my vm, and i got:
OpenBSD OpenBSD3-9.netbytesec.com 3.9 GENERIC#XXX i386
ahaa, nice.so, today i just installing a few network tools likes honeyd, snort and etc..etc.upps, i also need fluxbox and rxvt.heh.to ease my daily need.:D.
ohh,one more thing.please buy an original cd from www.openbsd.org.:D.i haven't got mine.:(.
Tuesday, July 04, 2006
tcpdump filter
these two weeks back, i was playing alot with network tools. one of the tools is tcpdump . usually i tend to ignore any sort of tcpdump filters trick. i just fired up my tcpdump with basic option like "-vv -n -s 1515 -x". but this is not a clean options for capturing packets. in this situation, what i plan to do is to avoid any non tcp traffics, traffics flying out thru my nic and to avoid traffics coming from unsuspicious hosts. so here is the tcpdump filter[note to myself,\0/].
tcpdump -vv -n -s 1515 -x tcp and 'port !22' and not host 192.168.1.1 and not host 192.168.1.2
noticed here that tcpdump using bpf's style on filtering the filters. tcp option is only to capture tcp traffics, not host is an option not to capture traffics coming from this host. in this example, i can avoid capturing traffics from my host 192.168.1.1 and 192.168.1.2. not 'port !22' option to avoid any traffics coming from port 22:ssh. noticed here when using '!' u need to put an quote '' between !.'!' is just another reserved char in tcpdump. so, be careful when using any of tcpdump reserved char. actually, this is a basic command for tcpdump. there are alot of tcpdump tricks and tips out there. the best place to learn more about tcpdump is www.tcpdump.org.
at the other hand of network tools i played are scapy, ruby libpcap and rubyforger. huhh, maybe i'll reserved these tools for next post.heh.:D
Wednesday, June 28, 2006
first post for the old blog
aha. now i started to feel weird again. when you're doing blogging, you're actually communicate with your readers. but, i didn't have the readers not even one. i used to have a blog before and it's still there.somewhere in this big world of internet. so, why im moving to this blogspot?.nah, im tired of fighting with spammers. they're roxx.:D.i don't think that mine blogspot account will be my main blog. it's just temporary i guest.:D. my plan is to have a mock-up blog before i ready to setup for the real one. when the real blog is ready, im moving to the real one.huhh..enuff for the first post. hofefully by the second post i start to blog about technical stuffs. i did love to share.
Subscribe to:
Posts (Atom)